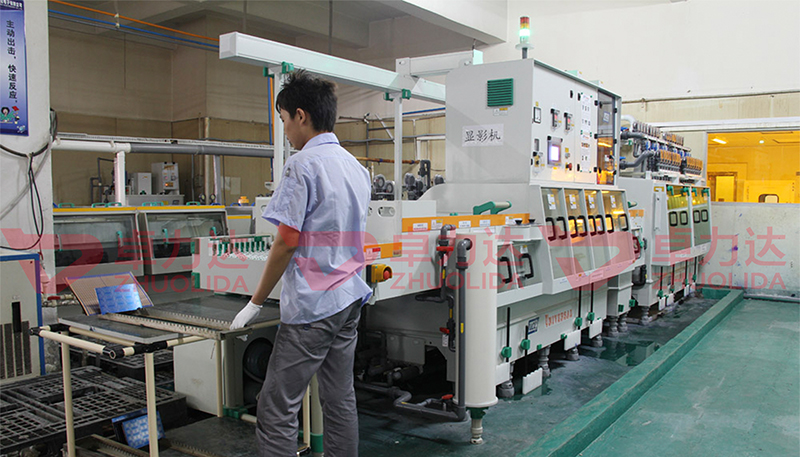
Etched stainless steel sheets are versatile, durable, and visually appealing, making them a popular choice in industries like architecture, interior design, signage, and art. This process involves removing material from a stainless steel surface to create intricate patterns, logos, text, or functional designs. The result is a sheet with a permanent, corrosion-resistant, and professional finish. Here's an in-depth guide to understanding and creating etched stainless steel sheets.
Durability: Stainless steel resists corrosion, rust, and wear, ensuring longevity in harsh environments.
Custom Designs: Etching enables detailed, high-precision patterns, logos, and text.
Versatility: Suitable for decorative panels, branding, signage, industrial applications, and more.
Low Maintenance: The etched designs are permanent, requiring minimal upkeep over time.
Decorative Use: Panels with ornate patterns for buildings or interior walls.
Signage: Durable, professional-looking signs for businesses or public spaces.
Industrial Labels: Functional markers for machinery, equipment, or control panels.
Art and Branding: Custom logos, decorative artwork, or personalized gifts.
Stainless Steel Sheet: Select the grade (e.g., 304 or 316) and thickness based on your project’s requirements.
Etching Solution:
Chemical Etching: Ferric chloride is a common choice.
Electrolytic Etching: Saltwater solution with a power source.
Resist Material: Adhesive vinyl, acid-resistant paint, or permanent markers to mask areas not being etched.
Cleaning Agents: Degreaser, isopropyl alcohol, and baking soda for neutralization.
Non-Metallic Container: For holding etching solutions.
Stencil or Template: For precise designs.
DC Power Source (Electrolytic Etching): Required for a controlled current during the process.
Polishing Supplies: Buffing tools or polishing compounds for a clean finish.
Protective Gear: Gloves, goggles, apron, and a mask for safety.
Clean the Steel Sheet:
Wash the surface with a degreaser to remove oils, dirt, and fingerprints.
Wipe with isopropyl alcohol to ensure a spotless finish.
Sand the Surface:
Lightly sand the sheet with fine-grit sandpaper (400–600 grit) to help the resist material adhere effectively.
Apply the Masking or Resist:
Use adhesive vinyl or acid-resistant paint to cover areas that should remain unetched.
For intricate designs, cut the stencil using a plotter or craft knife and adhere it firmly to the steel sheet.
Prepare the Ferric Chloride Solution:
If using concentrated ferric chloride, dilute it with water in a 1:3 ratio (1 part ferric chloride to 3 parts water).
Submerge the Sheet:
Place the stainless steel sheet in a non-metallic container with the ferric chloride solution.
Ensure the exposed areas face upward to achieve an even etch.
Monitor the Etching:
Depending on the concentration and desired depth, the process can take 30 minutes to 2 hours.
Gently agitate the solution periodically for uniform etching.
Neutralize and Rinse:
Remove the sheet and immerse it in a baking soda solution to neutralize the acid. Rinse thoroughly with water.
Set Up the Circuit:
Connect the stainless steel sheet to the positive terminal (anode) of a DC power source.
Attach a cathode (graphite or another stainless steel piece) to the negative terminal.
Prepare the Electrolyte:
Dissolve salt in water to create a conductive saltwater solution.
Start Etching:
Submerge both the anode and cathode in the solution, ensuring they do not touch.
Turn on the power (6–12V DC). Bubbles will form as the exposed metal areas are etched away.
Monitor and Neutralize:
Stop the process once the desired depth is reached. Neutralize the sheet in a baking soda solution and rinse thoroughly.
Remove the Resist:
Peel off the vinyl stencil or remove paint with a solvent like acetone.
Polish the Surface:
Buff the unetched areas with a polishing compound to create contrast and enhance the design’s visibility.
Optional Infill:
Apply paint or enamel to the etched areas for added contrast. Wipe away excess paint before it dries.
Work in a Ventilated Area: Etching chemicals can release harmful fumes.
Wear Protective Gear: Always use gloves, goggles, and an apron to avoid chemical burns.
Dispose of Chemicals Responsibly: Neutralize used solutions with baking soda before disposal, following local guidelines for hazardous waste.
Etched stainless steel sheets offer a unique combination of functionality and aesthetic appeal. Whether used for decorative panels, signage, or industrial purposes, the process allows for precise and durable designs. By following the steps outlined above, you can create stunning etched stainless steel sheets that are long-lasting and tailored to your specific needs. With proper care and attention to detail, your project will reflect professionalism and craftsmanship.
Contact: andy_Lai
Phone: 18938693450
E-mail: yw9@zldsmt.com
Add: Building A3, Huafa Industrial Park, Fuyong Town, Fuyuan Road, Fuyong Town, Baoan District, Shenzhen,China